
How to Mount and Frame Textile Art: Stitching, Stretching & Lacing Techniques
In a previous blog post, How to Display Mini Quilts, I shared ideas for showing small textile pieces that already have a ‘soft’ frame built in — like a binded edge or hanging sleeve. But what about those beautiful textile samples, embroideries, or stitched experiments that don’t yet have a home?
Whether it’s a tiny stitched study or a larger hand-embroidered panel, how we present textile work can make a real difference. For better or worse, textile art often seems to be taken more seriously when it’s placed within a frame — or at least presented in a way that echoes more traditional art forms like painting or printmaking. (I could write a whole post about the status of textiles in the art world… but I’ll save that for another time!)
Whatever your opinion about how textile work should be presented — whether you favour letting it hang loose and free, or prefer the clean lines of a mount or frame — there’s no doubt that thoughtful presentation can really elevate a piece.
Here are three techniques you might like to try for yourself:
Stitch mounting onto card
Stretching and stapling onto a canvas frame
Lacing over acid-free foam board
Each has its own pros, and none require a professional framer — just a few tools, a little time, and the desire to give your work the attention it deserves.
How to Stitch Mount Textile Samples onto Card
Give your slow stitch samples the spotlight they deserve
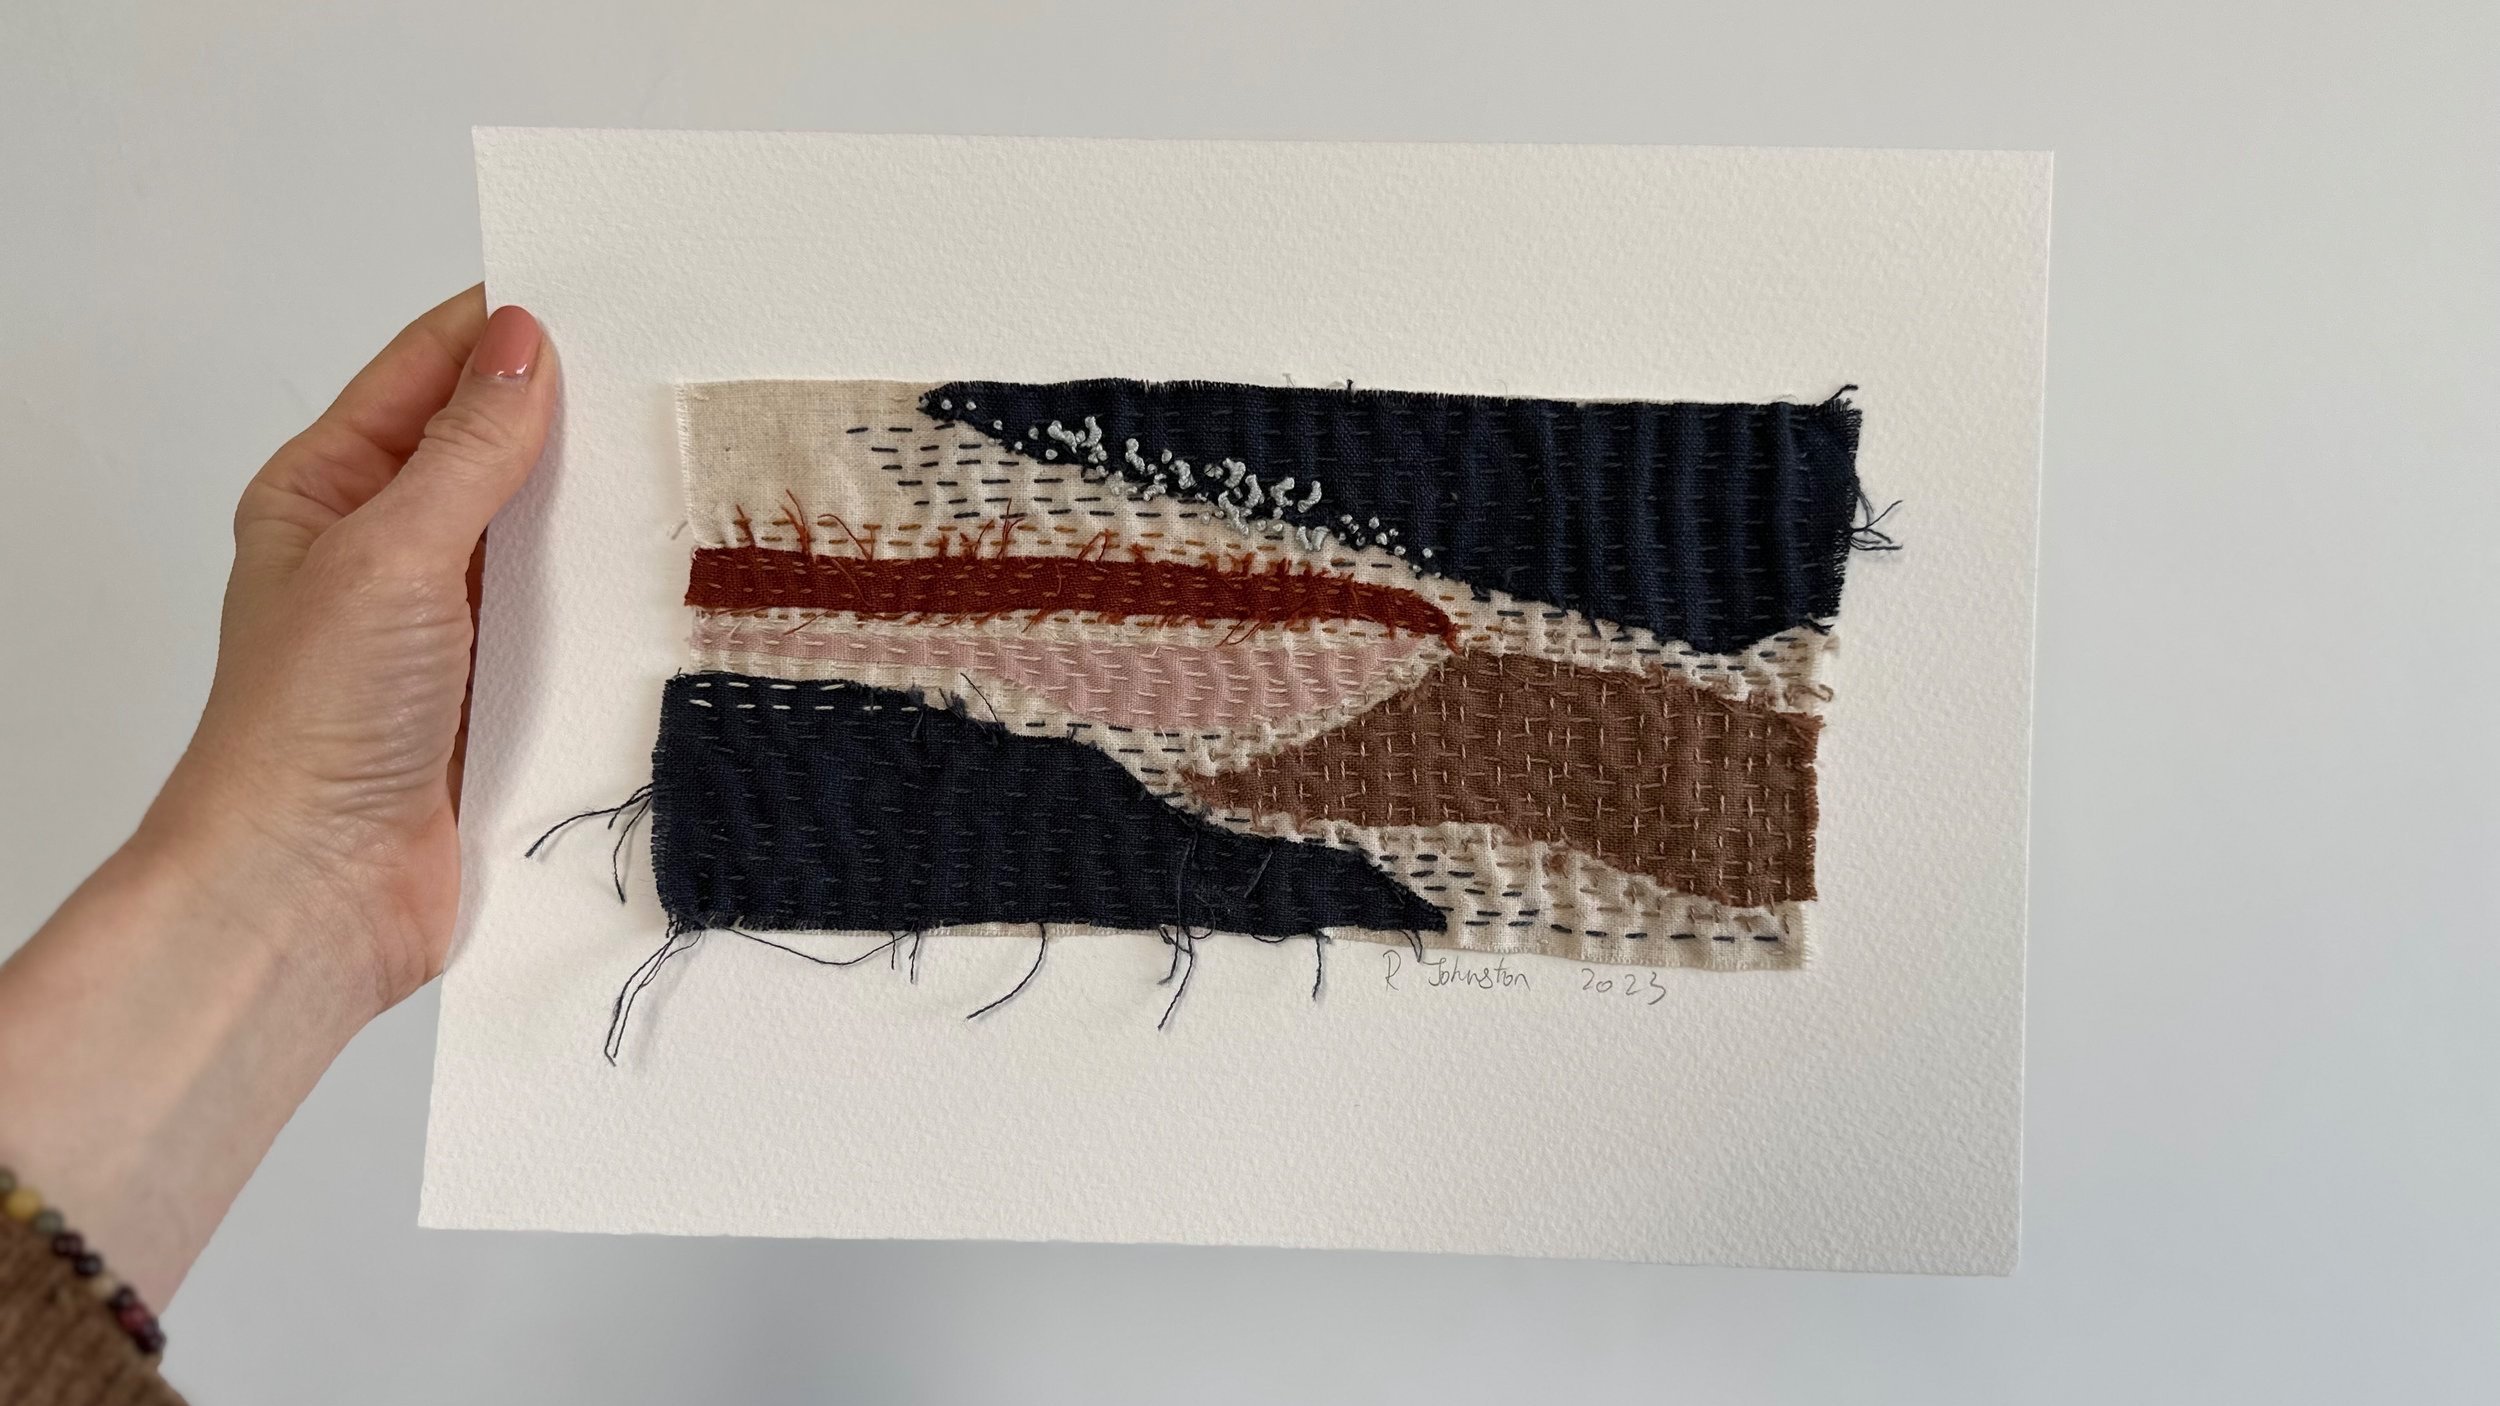
If you’re anything like me, you probably have a growing pile of stitched samples, experiments, and tiny treasures tucked away in a drawer or stacked on a shelf. Maybe they were made while testing out a technique, experimenting with colour, or simply stitched for the joy of it. But what happens next?
One of my favourite ways to give these pieces a new life is to mount them onto card. It’s a simple, satisfying process that turns scraps into shareable or frameable artworks — perfect for gifting, posting, or displaying around your home.
Here’s a step-by-step guide to stitch mount your textile samples:
What You'll Need:
Your textile sample
A piece of card (I use khadi paper or watercolour card, around 300gsm)
Needle and thread
Craft scissors or rotary cutter
Awl or sharp pin
Ruler and pencil
Double-sided tape (optional)
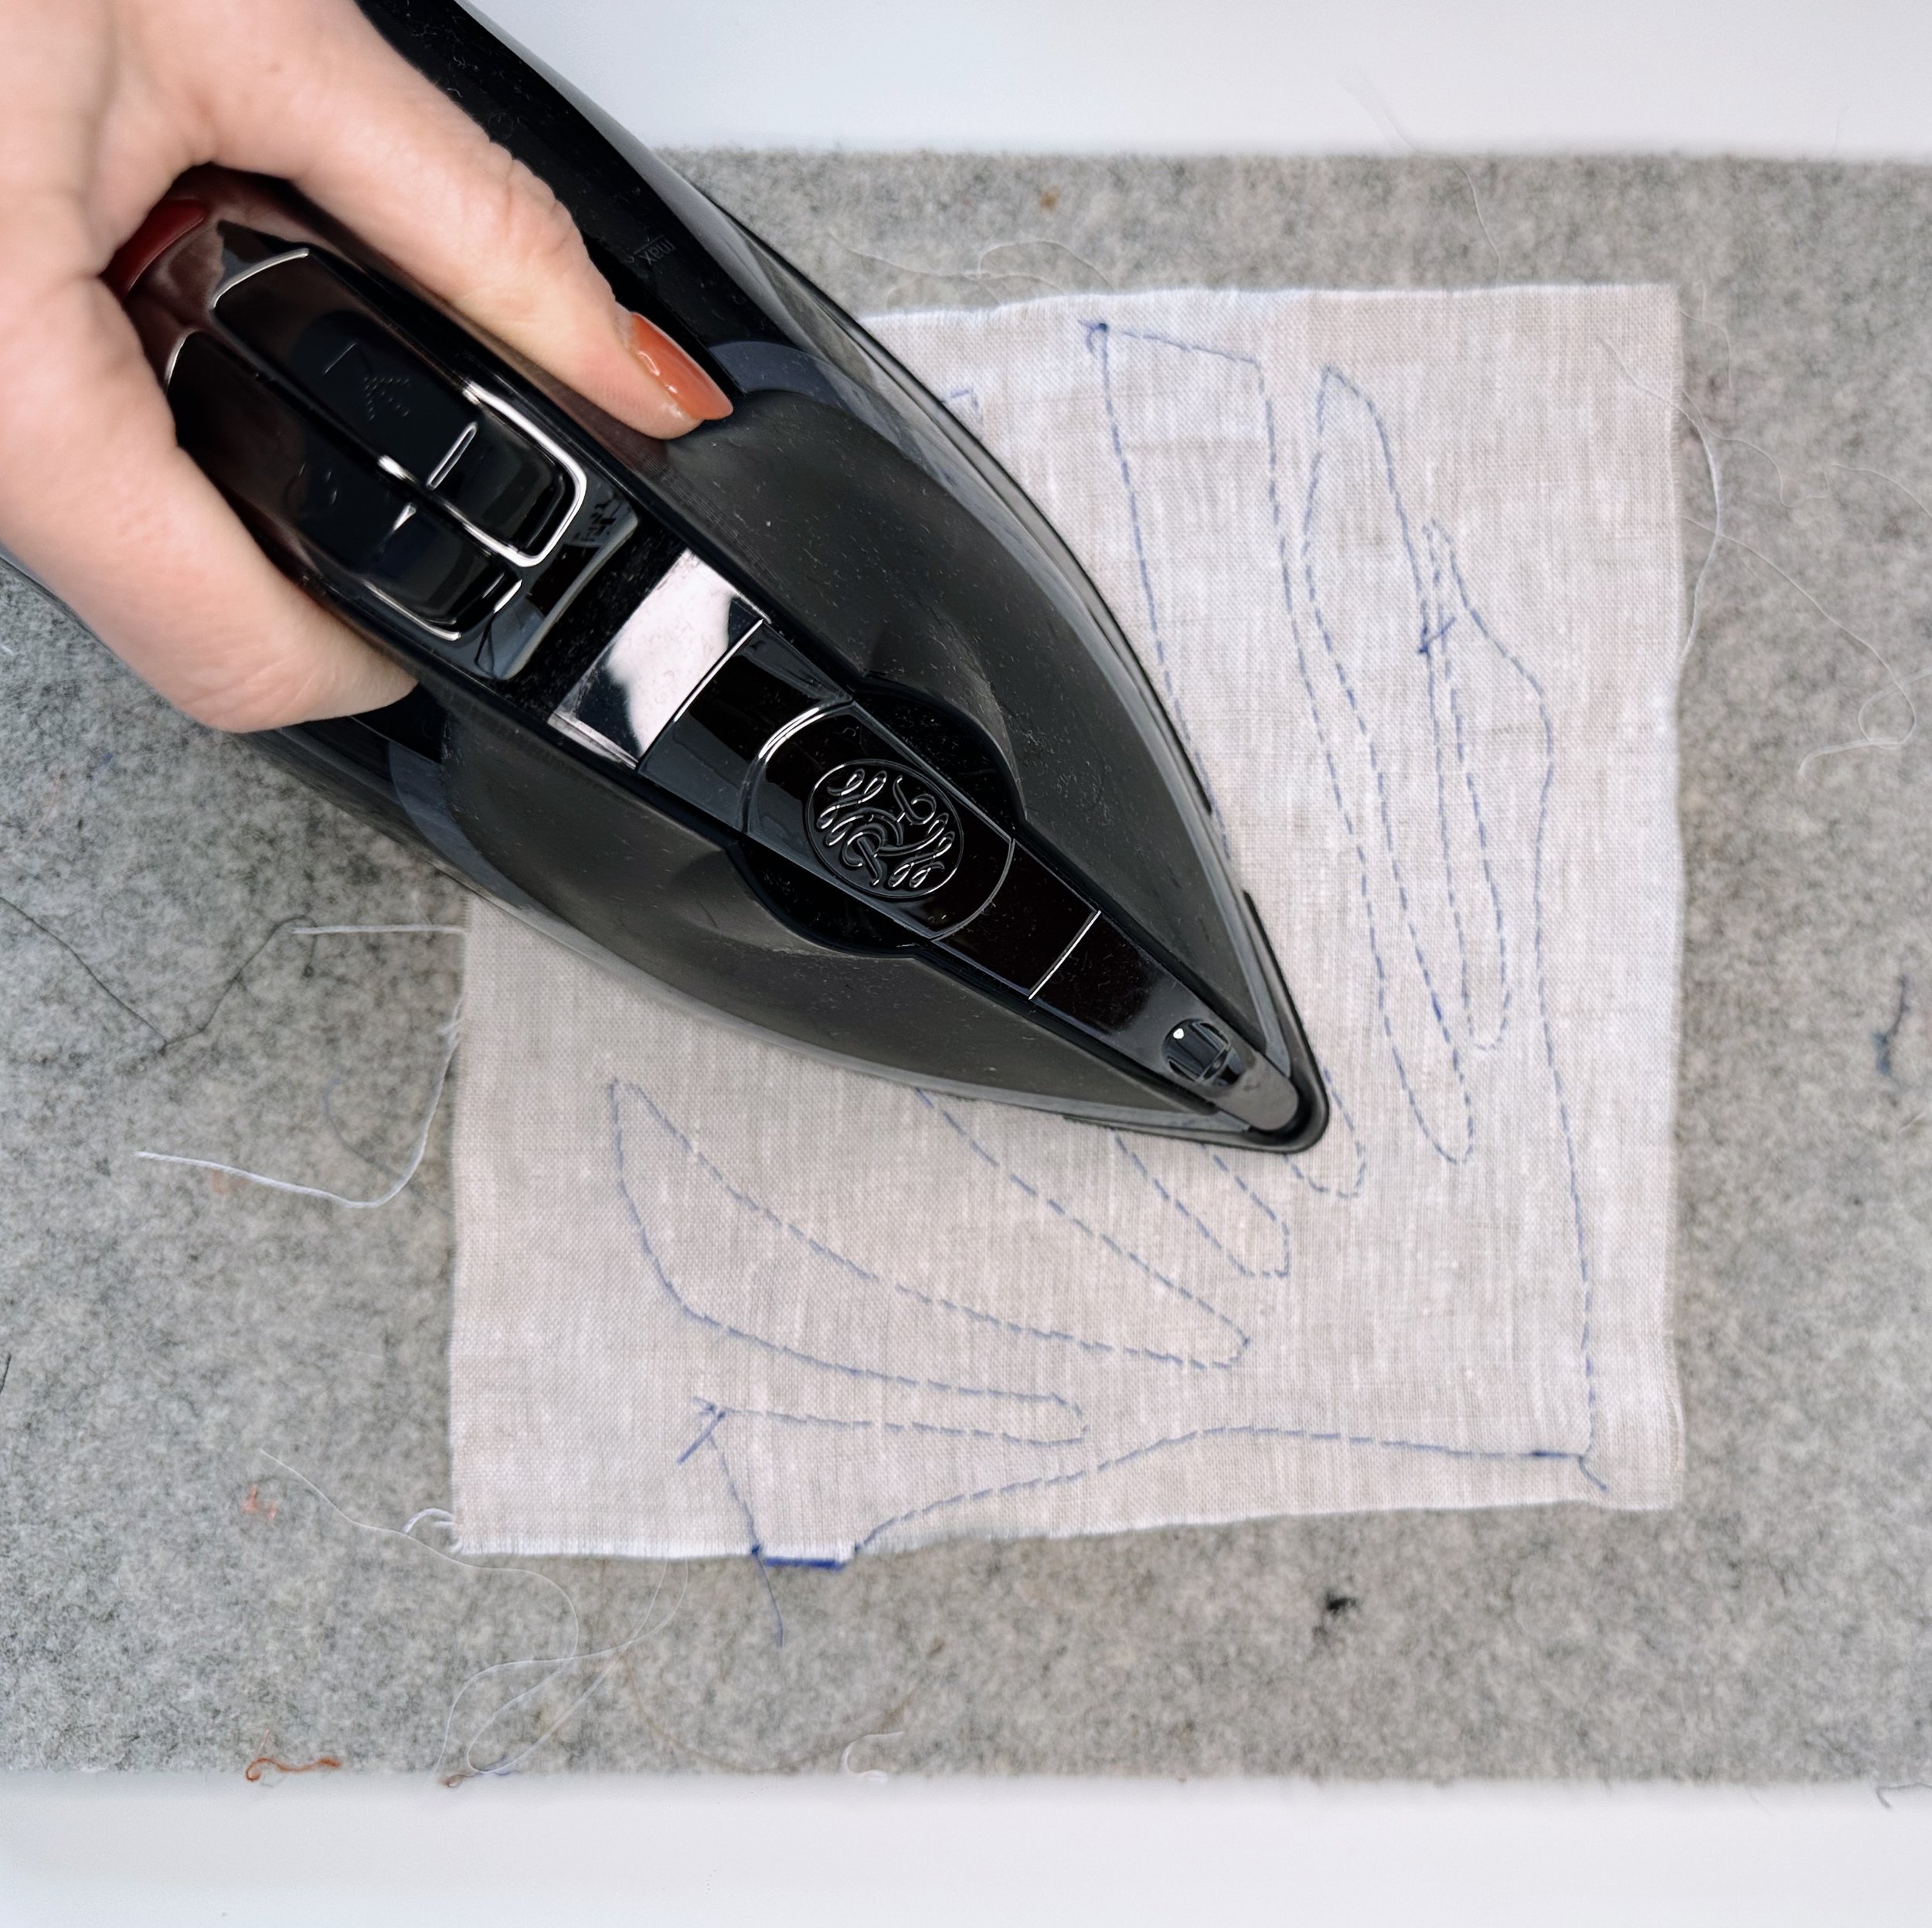
Step 1: Trim and Press Your Textile
Gently press your textile piece with a warm iron, using a pressing cloth if needed. Trim any loose threads, but leave the edges raw or frayed if you like that look — it adds character.
Step 2: Cut Your Card
Cut your card to size, leaving a margin around your textile sample for a clean border. You might like to use a standard postcard size (10 x 15 cm), or go larger for display.
Step 3: Measure and Mark for Placement
While I often eyeball placement (especially when I want a looser, handmade feel), it’s good practice to measure for a balanced layout — especially if you’re planning a series or gifting your piece.
Start by measuring the width and height of both your card and your textile sample. If your textile is an irregular shape, measure across the widest and tallest points.
To calculate how much space to leave around the edges:
Subtract the width of your sample from the width of your card, then divide that number by two. That gives you the gap to leave on the left and right sides.
Do the same for the height, subtracting the sample’s height from the card’s height, then dividing by two to get the top and bottom margins.
You can adjust these slightly to suit your style — I often leave a little more space at the bottom to ground the composition and make room for a signature.
Once you're happy with the measurements, lightly mark the corners of your sample’s placement in pencil.
Step 4: Pierce Stitching Holes
Use a sharp pin, awl, or needle to carefully pierce holes through the card where you plan to stitch. I usually stitch around the edge of the textile using small running stitches, so I pre-pierce at regular intervals (about 1 cm apart works well).
Step 5: Stitch the Textile to the Card
Thread your needle and knot the end. Begin stitching from the back of the card, bringing the needle up through a hole, across the textile, and back down through the next hole. Keep your stitches neat and gentle — pulling too tight may warp the card.
Tip: I usually match my thread for an invisible hold but you could use a contrasting thread to highlight the hand-stitched detail.
Step 6: Finish and Secure
Tie off your thread at the back and trim. If you'd like a tidier finish, you can glue or tape a second piece of card over the back to cover the stitches and knot. This makes it more giftable or ready to pop in the post.
Optional Extras:
Add handwritten details to the back: title, date, materials used, or a message.
Use double-sided tape on the back of the textile before stitching to help it stay in place.
Create a series for a beautiful set of mounted works — perfect for framing!
How to Staple Your Textile Work onto a Canvas Frame
A simple way to turn your stitched piece into wall-ready art

Unlike stitch mounting, this method requires a little forward planning — you’ll need to leave enough fabric around the edges of your work to stretch over the frame and secure it at the back. It’s for this reason I haven’t experimented with it as much myself (forward planning not exactly being my forte!), but when it works, the results are really satisfying.
Stretching your work over a wooden canvas frame gives it a clean, contemporary finish. It’s a great way to make your stitched piece wall-ready, and ideal for displaying both small samples and larger textile pieces with a bit of body or structure.
What You’ll Need:
Your stitched textile work
A wooden canvas stretcher frame (or a cheap pre-stretched canvas you can strip the fabric from)
A staple gun
Scissors
Optional: stretching pliers (recommended for larger works)
Step 1: Choose and Prepare Your Frame
You can buy canvas stretcher bars to assemble yourself, or repurpose an inexpensive store-bought canvas by removing the pre-stretched fabric. Just make sure the frame is sturdy and the back is accessible for stapling.
Your textile piece should be 4–6 cm larger than your frame on all sides, to give you enough to wrap and staple at the back. If you're using a deep-edge frame, allow a little extra — the thicker the frame, the more fabric you’ll need to go around it comfortably. Make sure your fabric is ironed.


Step 2: Centre Your Work
Lay your textile face down on a clean surface, then place your frame on top. Take a moment to centre your design so it’s balanced. This is especially important if your work has any focal motifs or strong lines — once it’s stapled, you can’t adjust it easily!
Step 3: Start Stapling from the Centre
Begin at the centre of the bottom edge and place three staples to anchor the fabric in place. Then move to the top edge, gently pulling the fabric taut, and add three staples to the centre there.
Next, repeat the process on the left and right sides, always pulling the fabric gently but evenly to maintain smooth tension.
If your piece is larger, you may find stretching pliers helpful to grip and pull the fabric evenly without distorting your work. For smaller pieces (like my 15 cm sample), you can usually manage without them.


Step 4: Work Outwards and Tension Evenly
Continue stapling outwards from the centre on each side, alternating opposite sides as you go (e.g. bottom > top > left > right). This helps keep the tension balanced and avoids puckering.
Take your time — pull gently but firmly, keeping the surface as smooth as possible. It doesn’t have to be drum-tight, but you want a consistent, even stretch.
Step 5: Fold and Secure the Corners
The corners can be a bit fiddly, but with some folding and patience, they’ll sit nicely. You’ll notice the fabric flares out slightly — fold and manipulate it so that it lies flat along the sides and isn’t too bulky at the back.
I like to pinch the excess at a 45-degree angle, then fold it neatly like wrapping a present and staple securely at the back. Tuck in any stray edges to create a clean line around the corner.


Optional Finish:
You can cover the back with a piece of paper or card if you want to hide the staples and give it a more finished feel — or just leave it raw if the back won’t be visible.
These stretched pieces are ready to display as they are, hung directly on the wall or propped on a shelf.
Alternatively, you can take them to a professional framer and have them placed in a floating frame — a beautiful, gallery-style option that leaves a small gap between the edge of your textile and the inner edge of the frame. It’s a lovely, professional finish that lets the texture and edges of your work breathe.
How to Lace Your Textile Work Over Foam Board
A traditional technique for a beautifully smooth, frame-ready finish

This final method is the most time-consuming of the three — but it’s absolutely worth the effort. Lacing your textile work over acid-free foam board creates a smooth, professional finish and is particularly well-suited to delicate fabrics, embroidery, or needlepoint. It’s often used as a preparatory step before framing and is ideal when you want your work to sit flat and free of adhesives or staples.
What You’ll Need:
Your textile work
Acid-free foam board, cut to the finished size of your piece
Plenty of pins
Strong thread (I use Perle cotton No. 8)
A sharp needle
Optional: fabric scissors and a ruler
Step 1: Cut Your Foam Board
Start by cutting your acid-free foam board to the exact size you’d like your finished piece to be. This will act as the base your textile wraps around. Because this method doesn't crop or cover the front of your work, it’s a great choice when you want clean edges visible in a mount or frame.
If your fabric is likely to fray, consider finishing the edges with an overlock stitch (or a zigzag stitch on a standard sewing machine) before lacing. This helps keep everything tidy and prevents the fabric from unravelling over time.
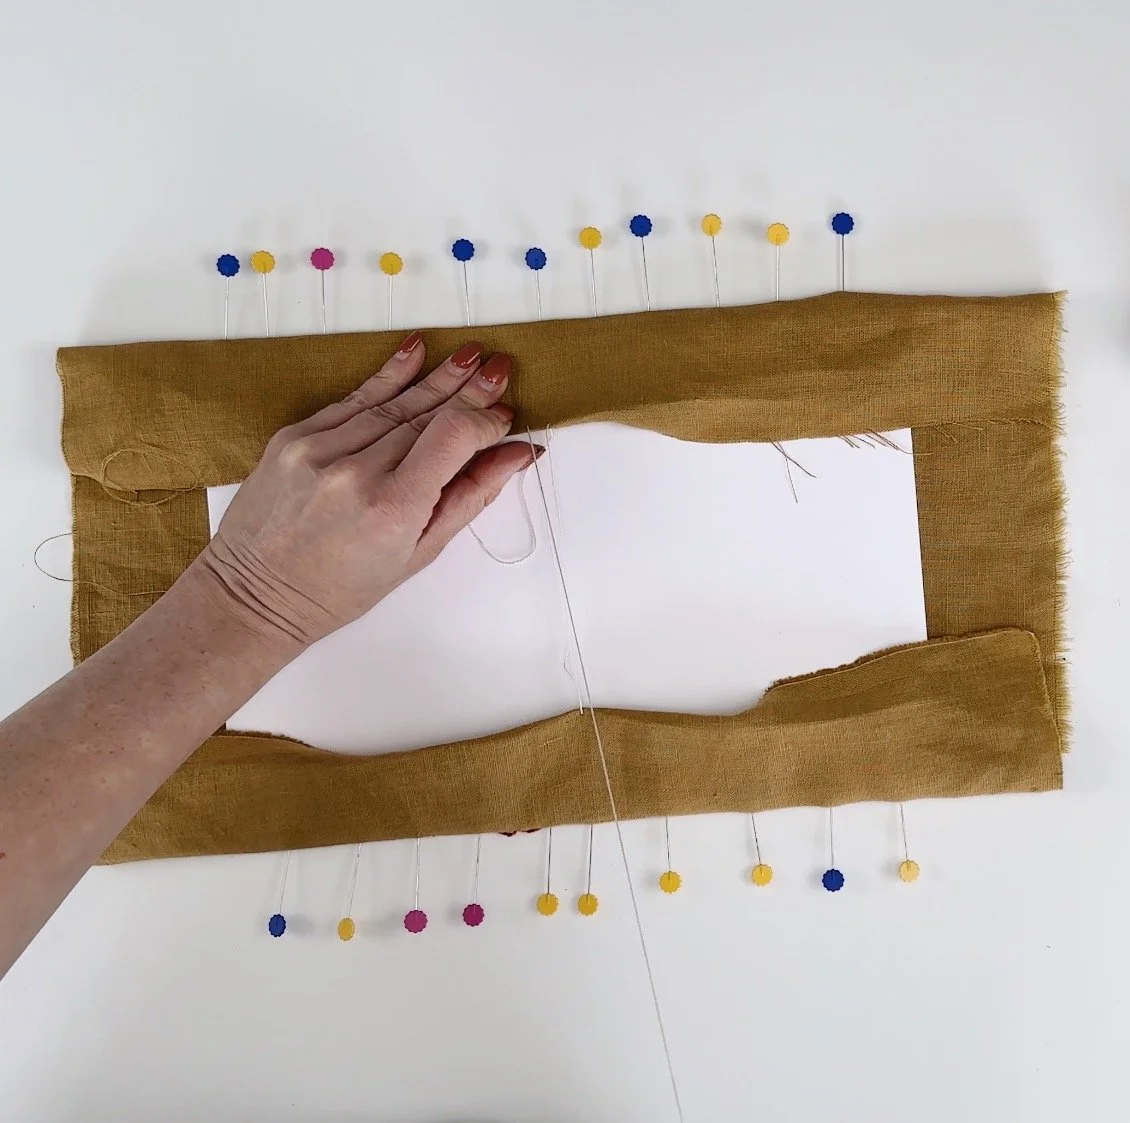
Step 2: Centre and Pin the Long Sides
Lay your textile face down on a clean surface. Place the foam board in the centre, ensuring you have at least 2–3 cm of extra fabric around each side to wrap around to the back.
Working on one long side first, insert pins directly into the foam to hold the fabric in place. Start in the centre and carefully pull and pin the fabric taut — tight enough to sit smoothly without wrinkles, but not so tight that it distorts the work. Continue working outward from the centre, pinning as you go, then return to the middle and work in the opposite direction to finish that side.
Repeat the process on the opposite long side: check that your work is still centred, then gently pull the fabric across the board and pin from the centre outwards as before. Leave the short ends unpinned for now.
Check the front to ensure everything looks smooth and balanced before moving on.


Step 3: Start Lacing (Long Sides)
Thread your needle with strong thread and triple knot one end. Begin in the centre of one long edge, stitching across the back to the opposite side in a gentle zig-zag motion — like corset lacing — pulling the fabric edges towards each other. Work from the centre outward to one end, then return to the centre and lace towards the other end.
I like to fold the raw edge under so I’m stitching through two layers of fabric for a neater finish. If you run out of thread, knot carefully and resume from the centre to keep tension consistent.
Take care not to catch your thread on the pins as you work — it’s easy to snag without noticing. Once both long sides are laced and the tension is even, remove the pins.


Step 4: Pin and Lace the Short Sides
Repeat the same pinning process on the short sides: start in the centre, pinning and pulling outward, then return to the centre and finish the opposite direction. Once pinned, repeat the lacing process from the centre outward on each short edge.
Check that the corners are sitting flat — you may need to fold or manipulate the fabric slightly to reduce bulk and allow the corners to lie neatly.


Optional Finish:
Once the lacing is complete, your piece is ready for insertion into a frame or to be mounted inside a window mount. Because the stitching is all on the back, the front remains pristine — no glue, no staples, just clean edges and even tension.

Whether you're mounting a stitched sample onto card, stretching your work over canvas, or carefully lacing it onto foam board, the way you present your textile art can really enhance its impact. Each method suits different types of work and styles — from quick and simple to more time-intensive — but all share one thing in common: they honour the time, care and creativity that went into making the piece. Thoughtful presentation isn’t about conforming to traditional art norms — it’s about giving your textile work the space and attention it deserves.
Need inspiration for your next textile art project?
Take a look at my range of on-demand tutorials


I’d love to hear from you
Have you tried any of these mounting techniques — or do you have a favourite way to display your textile art? Let me know in the comments below! And if you give one of these methods a try, feel free to tag me on Instagram — I always love seeing how others present their work.